Client and patch management using the UpdateServices module
With the release of Windows Server 2012 into the world, automating and managing Windows Server Update Services (WSUS) with PowerShell has become a little easier with the inclusion of the UpdateServices module. With the UpdateServices module, you get 12 cmdlets available to handle some of the more basic administration with WSUS that are listed in the table below.
| Add-WsusComputer | Get-WsusServer |
|---|---|
| Approve-WsusUpdate | Get-WsusUpdate |
| Deny-WsusUpdate | Invoke-WsusServerCleanup |
| Get-WsusClassification | Set-WsusClassification |
| Get-WsusComputer | Set-WsusProduct |
| Get-WsusProduct | Set-WsusServerSynchronization |
For this article, we will be using 5 of the cmdlets to manage the clients and updates on the WSUS server: Add-WsusComputer, Get-WsusUpdate, Deny-WsusUpdate, Get-WsusUpdate, and Get-WsusComputer.
Before moving forward with working with the UpdateServices module, you need to make sure that it is installed. Finding this can be done by running the following command.
| |

If you see the module, then you are ready to go, but if not, then the below steps will help you out to install the module on your system.
Enable UpdateServices module using the UI
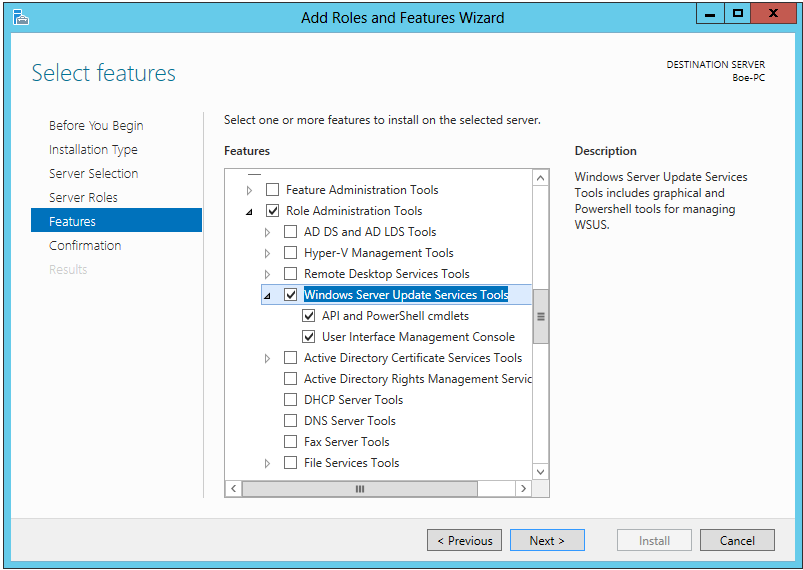
Open up Server Manager and then click Add Roles and Features to bring up wizard. Click next with the default selection of Role-based or feature-based installation. Click next at the next two windows until you are at the Features selection. Expand Remote Server Administration Tools, and then select Windows Server Update Services Tools. This will install the API, PowerShell module, and the Management Console for WSUS.

Enable UpdateServices module using PowerShell
Open up PowerShell and run the following command to enable WSUS.
| |
A reboot will not be required once this has completed. When you have installed the UpdateServices module, you are ready to go with managing WSUS!
Client management
Finding all of your connected clients is as simple as running Get-WsusComputer. This command will show you all of your clients:
| |

The Get-WsusComputer cmdlet contains some great parameters to help you filter exactly what you are looking for when searching for clients.
For instance, if you want to clean out clients that haven’t reported in 30 days, the following code will locate and remove the clients. Note that there is not a native cmdlet for removing a client from WSUS nor is it publicly available in the Microsoft.UpdateServices.Commands.WsusComputer object that Get-WsusComputer returns. We can work around this by using the WSUS API via the Get-WsusServer cmdlet and then use each computer name to call the GetComputerTargetByName() method followed by the Delete() method in the Microsoft.UpdateServices.Internal.BaseApi.ComputerTarget object that is available. I chose this hybrid approach because we can easily filter using the built-in cmdlet to get the list of computers and then run each of those through using the API to remove them from the server.
| |
Adding a client in WSUS to an existing Target Group is made simple using Add-WsusComputer and supplying a parameter for the TargetGroupName.
| |

Update management
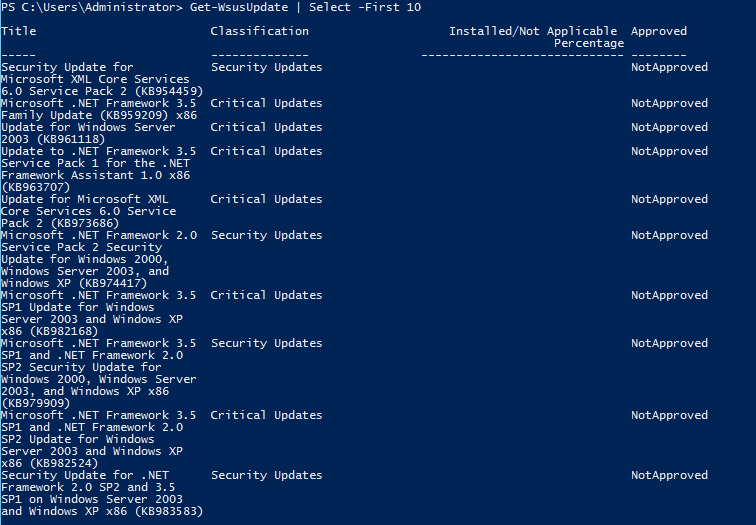
Similar to working with the clients, you can find all of the updates currently listed on the WSUS server by using Get-WsusUpdate A word of caution, using Get-WsusUpdate without any parameters will list all of the updates on the server which can take a bit of time.
| |

My personal favorite parameter on this cmdlet is –Status parameter which can easily filter for updates that are needed by the clients. The –Status parameter takes the type of Microsoft.UpdateServices.Commands.WsusUpdateInstallationState. One way to find what the acceptable value is by using the following command:
| |
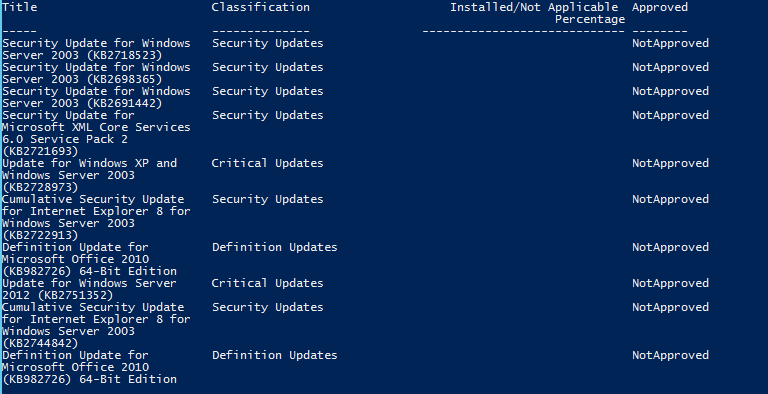
With this knowledge, we can run the following command to get all updates that are needed and have not been approved yet on the WSUS server.
| |

These are just a few of the updates that are needed by the clients that will need to be approved so they can be compliant with patches.
Now that we know how to get the required updates from the WSUS server, now it is time to start the approval process using Approve-WsusUpdate. The best approach to using this cmdlet is to pipe the output of Get-WsusUpdate into the Approve-WsusUpdate cmdlet followed by the TargetGroup and UpdateApprovalAction to complete the approval process.
| |
On the flip-side, there are times when an update is not needed and was approved on accident or is just no longer needed by the clients. For this case, Deny-WsusUpdate is available to use to quickly decline the updates.
| |
So there you go! Using these cmdlets can allow you to quickly automate your patch and client management duties with PowerShell!
Share on: