Git for IT Professionals: Working with Repositories
In this series so far:
Part 1 – Git for IT Professionals: Getting Started
Part 2 – Git for IT Professionals: Working with Repositories (this article)
Part 3 – Git for IT Professionals: Life cycle of repository files
In the previous article, I touched upon creating a Git repository but did not quite explain what those commands meant and what different ways of creating a repository are. In this part of the article, we will explore different ways of creating repositories and working with them.
Before we get started, let’s understand what a Git repository is. A Git repository is where your project lives. It is just another folder with .git subfolder inside it that contains all the version controlled objects. The git init command is what creates this .git subfolder and the required objects inside that. There are multiple ways of creating a new repository.
The first method is to simply run the git init
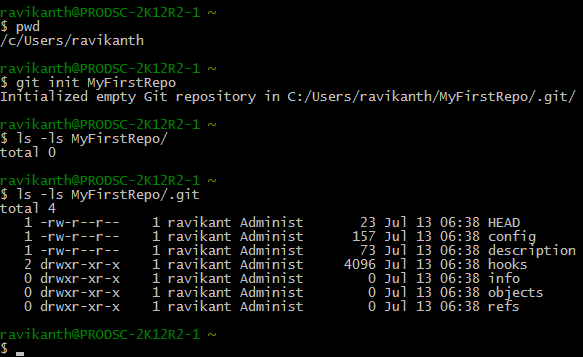
As you see in the above picture, running git init MyFirstRepo command creates a directory with the same name as the project and initializes the .git subfolder within that. This subfolder contains all the required files and folders to start tracking version control information for the project.
In the second method of creating a repository, we can go to an existing folder (even when it contains files) and initialize that directory as a repository.
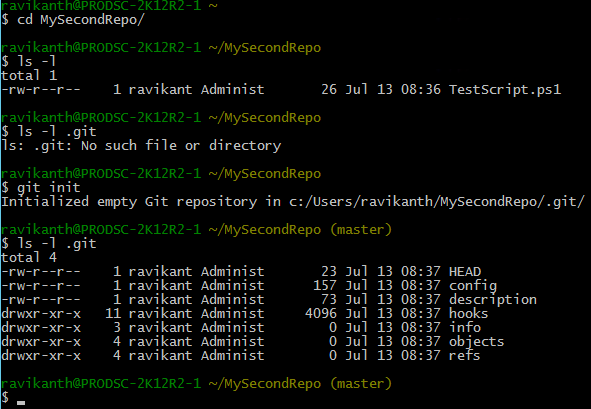
In the above example, you will see that I have an existing folder with a PowerShell script. Within that folder, I had initialized the repository and a .git subfolder gets created with similar contents as our first example. We will discuss the need and use of these special files and folders within the .git subfolder as we progress in this series.
There is a third method to create a Git repository and that is called cloning. We will discuss that at a later point in time. To see the status of the projects we just created, we can run git status command. This needs to be run in the project directory.
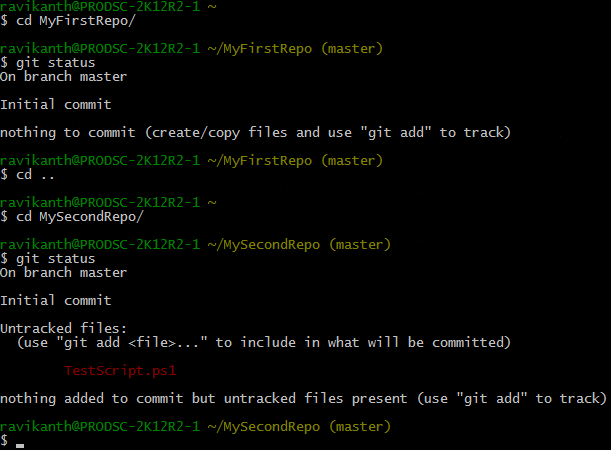
The output shown above has two important things we need to know. First is the branching concepts and how to use it effectively. For now, understand that like every other VCS, Git supports branching and that master branch is the main branch in the repository. The second thing we need to know is the commit concepts. The above command output shows that there is nothing to commit (for MyFirstRepo) and we can use git add command to create or copy files to track. For the second repository (MySecondRepo) which was initialized in an existing directory, we see that there are untracked files and output suggesting that we use git add
Unlike other VCS, Git does not track or commit any files into the repository unless they are explicitly added using the git add command. This eliminates accidental commits that developers generally face with other VCS. Let’s run git add TestScript.ps1 inside the MySecondRepo repository and see what happens.
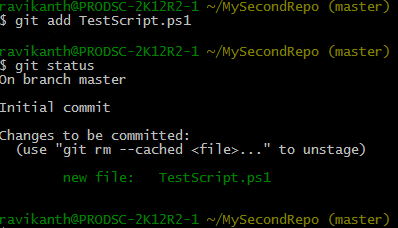
As shown in the above output, running git add command inside the repository adds the file specified to tracking and stages it for any future commits. Internally, Git takes a snapshot of the tracked files in the working tree and stores that in the Git index. The below output from the project’s .git directory shows that the tracked files are now added index (file named index).
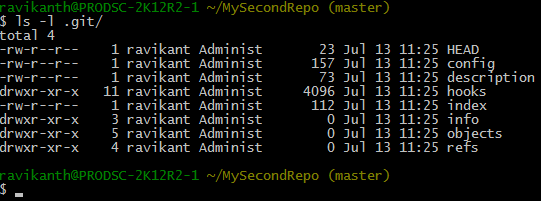
We can now commit this file by using the git commit command.
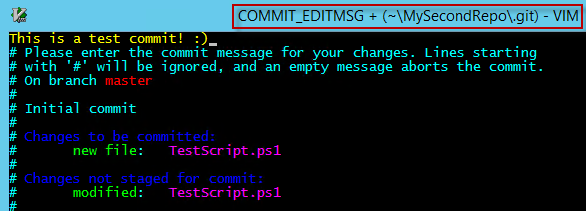
When we use git commit command, we are expected to specify the commit message. If that was not provided as a part of the command line arguments, the default VIM editor gets opened for prompting the message.
Note: If you are not a big fan of VIM and instead want to use PowerShell ISE as the editor for these messages, you can change it in the Git configuration settings using git config core.editor powershell_ise.exe command.
If you want to avoid this prompt, you can specify the –m switch. For example,
| |
Once the commit is complete, you will see output similar to the below.

If you have followed the steps so far and completed a git commit, congratulations! You just followed the end to end flow for creating your first version controlled repository.
Since Git takes a snapshot of the working tree, any changes made after the git add command won’t be staged for commit. So, if we modify a file that is tracked and committed, running git status command will tell us that there are changes to tracked or committed files that are not staged yet.
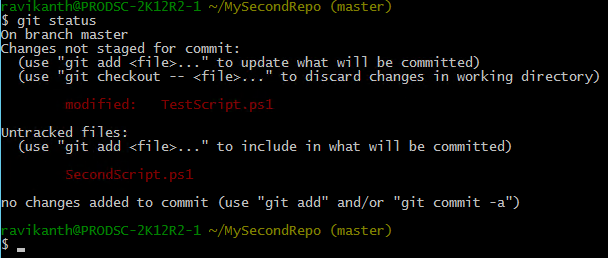
At this point, if you want to commit the updates to a tracked file or start tracking new files, you know what exactly you need to do. Yes, you need to use the git add command. Running git add command again will take a snapshot of all the tracked and/or modified files to the index and stages it for next commit.
If you all you want to do is update already tracked files, we can use git add command with –update switch. This will modify the index for already tracked and modified files but does not add any new files that are not tracked.
What we have learned so far is the basics of working with repositories. There is certainly more. However, let’s stop here for now and practice what we learned so far.
I have mentioned different states of a Git controlled file. For example, Git file goes from untracked to tracked state and unstaged to staged state and finally, it goes to a committed state. The git status command provides this information. However, it is important to understand the life cycle of a Git repository to make better use of VCS. And, that is our next article. Stay tuned.
Share on: